Labels

Showing posts with label Home. Show all posts

Saturday, October 9, 2010

A Night at The Kitchen

Diesel took me to The Kitchen for my birthday and it was hands down one of the best meals of my life.  Combine the food with the attitude that "there are no rules" and it becomes a night to remember.  Want seconds or thirds of a dish?  Just ask.   Want to wander through the kitchen, walk in fridge and wine cellar?  Go for it. 

I only have one thing to say - This place is awesome.

Now I just need to start saving my pennies so I can go back.
DSC_0058
DSC_0064
DSC_0070
DSC_0066
DSC_0072
DSC_0090
DSC_0093
First Course - ‘Thai Style’ Coconut Milk Soup with Wild Frog Legs, Mushrooms, Bamboo Rice and Cabbage Slaw
DSC_0101
DSC_0103
Second Course -  A ‘Burrito’ of Wagyu Beef Ribeye, Eggplant and Goat Cheese with an Herbed Crayfish Salad and Tomato-Corn Butter
DSC_0106
Freshly grated wasabi
DSC_0114
Sushi Course
DSC_0120
DSC_0130
DSC_0127
Third Course - Maine Lobster Bolognese and Tempura Egg Yolk with Butter Poached Black Truffle Pasta and Red Wine-Parmesan Broth
DSC_0133
DSC_0138
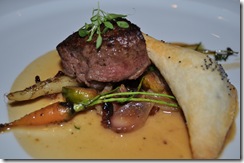
Fourth Course - The Kitchen’s Steak Diane with Puff Pastry, Potato, Small Carrots, Onions and Homemade Bacon
DSC_0156
White glove tea service
DSC_0150
DSC_0158
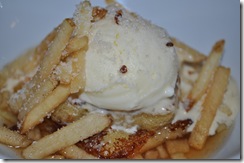
Dessert Course - Brioche French Toast and Apple Consommé with Pink Lady Apple Fries, Tahitian Vanilla Ice Cream and Maple Sabayon

Thursday, September 30, 2010

Batter Blaster

I love my boyfriend.


Sometimes we watch weird commercials on late night tv and talk about how bizarre certain organic, canned, pancake batter products are.


Then one day he brings home this.


He's the best.


Monday, September 13, 2010

Monster Cookie

Growing up, every time I walked past the cookie stand in Del Amo mall, I lusted after the enormous, pizza sized chocolate chip cookies they sold. “How cool would it be", I wondered, “to have one of those for my next birthday?”

But unfortunately the attention span of a child is akin to that of a goldfish, and my birthday would come and go with the giant cookies present only as a distant memory.

Flash forward almost twenty years and Diesel's mother had entrusted me with the awesome responsibility of contributing the cake for Diesel’s 33rd birthday party. Nervous to impress, I asked him what kind of cake he wanted for his birthday. “I don’t like cake,” was his only reply.

How was I to impress his family with the centerpiece of the birthday meal if he didn’t want cake?? Didn’t he know that I needed him to have a preference for the traditional dessert I was expected to provide??


And then I thought of cookies. Iced cookies, chocolate cookies, ice cream sandwich cookies – all of which would probably satisfy the peculiarly picky sweet tooth of my aging boyfriend, but none that packed the WOW factor I was hoping to deliver.


And then it came to me. What I really needed was one of the man-hole sized cookies from my childhood.

I ended up making two cast iron skillet sized cookies, instead of the monstrosity of my day dreams, but the end result was no less impressive. I served one cooled and frosted with the traditional birthday message, and one hot and melty - straight out of the oven, just the way he likes it. Accompanied by vanilla and homemade cheesecake ice cream, the dessert set a delicious tone for an exciting new year.

** My icing job did not do this cookie justice. Luckily, it didn't effect the taste.


Monster Cookie
(courtesy of the queen, Martha Stewart)
12 servings

• 2 cups all-purpose flour
• 1 teaspoon baking soda
• 1/2 teaspoon salt
• 3/4 cup unsalted butter, softened
• 1/2 cup sugar
• 3/4 cup packed light-brown sugar
• 1 large egg
• 2 teaspoons pure vanilla extract
• 1 bag (12 ounces) semisweet chocolate chips

1. Preheat the oven to 350 degrees. In a medium bowl, whisk together flour, baking soda, and salt; set aside. In an electric mixer fitted with the paddle attachment, cream butter and sugars together until mixture lightens and becomes fluffy, about 2-3 minutes. Add the egg and vanilla and mix until they they have become fully incorporated into the butter mixture. Add flour mixture, and beat until just combined. Stir in chocolate chips.

2. Transfer dough to a 10-inch ovenproof skillet, and press to flatten, evenly covering the bottom of the skillet. Bake until edges are brown and top is golden, 35 to 40 minutes. Don't overbake; it will continue to cook a few minutes out of the oven. Transfer to a wire rack to cool, 15 to 20 minutes. Cut into 12 wedges. Serve warm for the yummiest effect.

Wednesday, June 23, 2010

Downtown Bakery and Creamery's Doughnut Muffins

Yum.

Maybe double yum.

Not only are these amazing, but they might even be better than the originals.

I watch food network alot, and I always take notes when I see them feature restaurants or bakeries in my area. So when I went to Napa a few weeks ago, I knew I had to take a sidetrip to Healdsburg to check these babies out. And they were good.

So good in fact, that I decided to make them the next weekend for a road trip we were taking with friends. Not only were they gobbled up, but Diesel told me they are better than the first ones we tried.

And you know what? I agree.


Doughnut Muffins
For the muffins:
12 oz. (24 Tbs.) unsalted butter, warmed to room temperature
1-3/4 cups sugar
4 large eggs
1 lb. 11 oz. (6 cups) all-purpose flour
1 Tbs. plus 2 tsp. baking powder
1/2 tsp. baking soda
1-3/4 tsp. salt
1 tsp. ground nutmeg
1-2/3 cups milk
1/4 cup buttermilk
1 1/2 teaspoons vanilla extract

For the topping:
8 oz. (16 Tbs.) unsalted butter; more as needed
2 cups sugar
2 Tbs. ground cinnamon


To make the muffins:
Put a rack in the middle of the oven and heat the oven to 350°F.
In a stand mixer or a large bowl, cream the butter and sugar for 5 mins, until lighter in color and sugar particles are not obvious.
Beat in the eggs, one at a time, until just mixed in.
Sift together the flour, baking powder, baking soda, salt, and nutmeg. Combine the milk, buttermilk and vanilla extract.

With a wooden spoon, mix a quarter of the dry ingredients into the butter mixture. Then mix in a third of the milk mixture. Continue mixing in the remaining dry and wet ingredients alternately, ending with the dry. Mix until well combined and smooth, but don't overmix.
Grease and flour a standard-size muffin tin. Scoop enough batter into each tin so that the top of the batter is even with the rim of the cup, about 1/2 cup. (An ice-cream scoop gives you the perfect amount.)
Bake the muffins until firm to the touch, 30 to 35 min.


To Finish:
Melt the butter for the dipping mixture. Combine the sugar and cinnamon.
When the muffins are just cool enough to handle, remove them from the tin, dip them into or brush them all over with the melted butter, and then roll them in the cinnamon sugar.

Make Ahead Tips:
You don't have to bake all the muffins right away; the batter will keep, covered and chilled, for up to three days in the refrigerator.

Thursday, June 3, 2010

Leite’s Consummate Chocolate Chip Cookies

Leite’s Consummate Chocolate Chip Cookies
Adapted from David Leite via The New York Times

Yield: 1 1/2 dozen 5-inch cookies.

2 cups minus 2 tablespoons(8 1/2 ounces) cake flour
1 2/3 cups (8 1/2 ounces) bread flour
1 1/4 teaspoons baking soda
1 1/2 teaspoons baking powder
1 1/2 teaspoons coarse salt
2 1/2 sticks (1 1/4 cups) unsalted butter
1 1/4 cups (10 ounces) light brown sugar
1 cup plus 2 tablespoons (8 ounces) granulated sugar
2 large eggs
2 teaspoons natural vanilla extract
1 1/4 pounds bittersweet chocolate disks or fèves, at least 60 percent cacao content
Sea salt

1. Sift flours, baking soda, baking powder and salt into a bowl. Set aside.

2. Using a mixer fitted with paddle attachment, cream butter and sugars together until very light, about 5 minutes. Add eggs, one at a time, mixing well after each addition. Stir in the vanilla. Reduce speed to low, add dry ingredients and mix until just combined, 5 to 10 seconds. Drop chocolate pieces in and try to incorporate them without breaking them. Press plastic wrap against dough and refrigerate for 24 to 36 hours. [Dough may be used in batches, and can be refrigerated for up to 72 hours.]

3. When ready to bake, preheat oven to 350 degrees. Line a baking sheet with parchment paper or a nonstick baking mat. Set aside.

4. Scoop 6 3 1/2-ounce mounds of dough (the size of generous golf balls) onto baking sheet, making sure to turn horizontally any chocolate pieces that are poking up; it will make for a more attractive cookie. Sprinkle lightly with sea salt and bake until golden brown but still soft, 18 to 20 minutes. Transfer sheet to a wire rack for 10 minutes, then slip cookies onto another rack to cool a bit more. Repeat with remaining dough, or reserve dough, refrigerated, for baking remaining batches the next day. Eat warm, with a big napkin.

* I found Valrhona’s fèves or oval-shaped chocolate pieces, at Whole Foods in half pounds. Baking discs can be found from a number of brands, from Jacques Torres to E. Guittard (Fresh Direct used to sell these by the quarter pound, but now just in one pound boxes, but still at a very reasonable price) to Ghiradelli. Can’t find them? Use the largest chocolate chips you can find. Ghiradelli sells some slighly larger ones in the brown bag (as opposed to the standard-sized chips in the gold bag) though I may have mixed the two varieties up. It wouldn’t be the first time.
Wednesday, May 5, 2010

Tres Leches Cake = YUMMY

I was a little skeptical about a wet cake, but this cake is fantastic. It makes an awesome addition to any potluck or Cinco de Mayo party.


Tres Leches Cake
Prep Time: 45 Minutes
Cook Time: 1 Hour
Servings: 12

Ingredients
• 1 cup All-purpose Flour
• 1-½ teaspoon Baking Powder
• ¼ teaspoons Salt
• 5 whole Eggs
• 1 cup Sugar, Divided
• 1 teaspoon Vanilla
• ⅓ cups Milk
• 1 can Evaporated Milk
• 1 can Sweetened, Condensed Milk
• ¼ cups Heavy Cream

For the icing:
• 1 pint Heavy Cream, For Whipping
• 3 Tablespoons Sugar

Preparation Instructions

Preheat oven to 350 degrees. Spray a 9 x 13 inch pan liberally until coated.

Combine flour, baking powder, and salt in a large bowl. Separate eggs.
Beat egg yolks with 3/4 cup sugar on high speed until yolks are pale yellow. Stir in milk and vanilla. Pour egg yolk mixture over the flour mixture and stir very gently until combined.
Beat egg whites on high speed until soft peaks form. With the mixer on, pour in remaining 1/4 cup sugar and beat until egg whites are stiff but not dry.
Fold egg white mixture into the batter very gently until just combined. Pour into prepared pan and spread to even out the surface.
Bake for 35 to 45 minutes or until a toothpick comes out clean. Turn cake out onto a rimmed platter and allow to cool.
Combine condensed milk, evaporated milk, and heavy cream in a small pitcher. When cake is cool, pierce the surface with a fork several times. Slowly drizzle all but about 1 cup of the milk mixture—try to get as much around the edges of the cake as you can.
Allow the cake to absorb the milk mixture for 30 minutes. To ice the cake, whip 1 pint heavy cream with 3 tablespoons of sugar until thick and spreadable.

Spread over the surface of the cake. Decorate cake with whole or chopped maraschino cherries. Cut into squares and serve.

Friday, April 30, 2010

Mini Raspberry Tarts


Raspberry Tarts
makes 24 muffin-size tarts (with some leftover filling) or 2 full-size pies

2 refrigerated pie crusts (the kind that come rolled up in a box, not already pressed into a pan)
1 packet gelatin
3 small lemons, juiced (about 1/2 cup)
1 teaspoon lemon zest
2 cans sweetened condensed milk
1 (10-ounce) package frozen raspberries, thawed but not drained
fresh raspberries to garnish

Preheat the oven to 450 degrees. Lightly spray a muffin tin with cooking spray.
Working with one pie crust at a time, unroll it, and use a 3-inch biscuit cutter to cut 12 circles.
Take each circle of dough and roll it gently with a rolling pin until it's just a bit bigger and thinner, so that it will fill a muffin cup. When you press the dough into the muffin tin, the top of the dough should reach the top of the cup with rippled edges.
Bake the tart shells for 10 minutes, until golden brown. Let cool.

In a large bowl, dissolve the gelatin in the lemon juice and stir. Whisk in the lemon zest and condensed milk.
Add the raspberries and their juices. Stir well to combine. (You can use a hand-held mixer to make the filling extra smooth, if you'd like.)
Fill the baked, cooled tart shells with a few spoonfuls of the raspberry mixture, or divide the filling between the two pie crusts.
Cover with plastic wrap and chill until firm.
Garnish with fresh raspberries or whipped cream.


*Note: The filling also makes a good trifle, by the way, layered with whipped cream.

Monday, July 6, 2009

Blackberry Limeade Fizz

Summers in Sacramento are hot. Ridiculously it’s-110-degrees-and-I-can-feel-my-face-melting-in-the-sun hot. Because of the sweltering heat, I am always on the look out for refreshing beverages that are tasty without being overly sweet and cloying. This blackberry limeade not only fits the bill perfectly, but is a wonderfully rich shade of purple to boot.

IMG_1773

One of my absolute favorite things to buy at my local farmer’s market is luscious blackberries that are as big as my thumb, and I will definitely be turning many more of them into this delightful drink in the future. The most difficult part about this recipe is not eating all of the blackberries prior to making the drinks!

IMG_1775

Ingredients
• Makes 8 servings
• 6 cups water, divided
• 3 cups fresh blackberries
• 1 cup sugar
• 2/3 cup fresh lime juice (about 5-6 limes)
• 8 thin lime slices
• Fresh blackberries (optional)

Preparation

1. Place 1 cup water and 3 cups blackberries in a blender; process until smooth. Press blackberry puree through a sieve into a large pitcher and discard seeds and skins.

2. Add remaining 5 cups water, sugar, and juice to pitcher; stir until sugar dissolves.

3. Place 1 lime slice and a few blackberries, if desired, into each of 8 glasses; pour about 1 cup limeade over each serving.

IMG_1771

Monday, February 2, 2009

World Peace Cookies

UC Davis colors.  Go Ags!

These cookies are good. Seriously good. Don't let their looks fool you. These cookies turned out so well that I decided to send them to my little brother as part of a care package. I gave them up for him. I hope he can appreciate that.

MMmmmm....

I made these cookie for Tuesday's with Dorie this week, and I am so glad I did. I skipped a couple of recipes last month, and I wasn't entirely sure about these cookies. I'm not normally a huge fan of chocolate cookies (except for these of course), but these sure hit the spot.

Aren't they cute in their box!

In fact, I've already decided that my soldier is getting these next month. Lucky boy!

Tuesday, November 18, 2008

An Amateur Gourmet's Ode to her Knife

Oh knife
Your glistening edge
Slicing
Carving
Dicing
Chopping
Glorious foods
Into perfect shapes

Creating
A wedge
A sliver
A flawless julienne
All in the name
Of TASTE

Oh knife
I thank thee
For working past the point
Where the wrist has been exhausted
And the hand hurts

The unsung hero
On the culinary battleground

Oh knife
Despite the bandaged fingers
And scarred cutting boards

You share in my tasty joys
Abject failures
And everything in between

You have been both friend
And sous chef

Oh knife
I thank thee
Noble companion
And humble assistant


*In case anyone was wondering – I LOVE my knife. It is a Victorinox Fibrox 8 inch Chef’s knife. Buy one. You too will be writing poetry about it in no time at all.

Monday, November 10, 2008

A Book, a Guy and a Restaurant or The Three Stooges

I have always been amazed at the way some people act. My life has been lived largely reserved, shy, and aloof. Call it what you will, the majority of the time, I manage not to make an ass out of myself. Mostly because, above all else, I strive to not look like an idiot. Maybe not the most noble of goals, but one that has generally served me well. And yet, throughout my adult life, I have been constantly surprised by the fact that not only do other people not mind acting like retarded monkeys, they seem to enjoy it. WTF?!?

Take my experience this weekend for instance. I had the pleasure of meeting one of my favorite Food Network chefs, Guy Fieri, at a cookbook signing at his new restaurant in town, Johnny Garlic’s. The pleasurable part being the 30 seconds that I spent with Diesel and Guy (who is just as laid back and outgoing as he seems on TV). The other hour and a half that I spent standing in line was an awkward mixture of being fascinated/horrified by the three women in line in front of me.

If I could sum up the morning in one sentence it would be, “Smell my book.” That’s right. One of the ladies spent a good 10 minutes trying to convince her companions to smell the book she had brought to be autographed. But, on second thought, maybe that’s not the strangest thing. After all, who hasn’t begun smelling inanimate objects as a result of boredom?

But the truly shocking part was not the lady with, according to Diesel, some'er teeth (some are there and some are not). It wasn't the instant that the three reached the door of the restaurant, could see Guy less than 15 feet away and began screaming and waving (keep in mind that this was in the middle of a crowded restaurant at the height of Saturday lunch hour). No, it was when the three of them went to take their picture with Guy, and the lady with the some'er teeth began making kissing noises an inch from Guy's ear.

Yea, that was weird. I have no idea why people do the things that they do.

IMG_0367

Sunday, November 9, 2008

Chicken! Apples! Brie!

Sometimes, I see recipes that interest me, cut them out, put them in my recipe book and don’t think about them again for months, or even years. And sometimes, I see a recipe, run to the store, buy what I need and make it immediately.

This was one of those recipes.


4 (4 oz each) boneless, skinless chicken breasts
2 large Granny Smith apples, peeled, cored and sliced thin
1/2 lb brie cheese, rind removed and sliced thin
1 cup corn flakes, crushed
1 large egg, lightly beaten
Salt and pepper

Pound chicken breasts until they are evenly thin. Lightly season breasts with salt and pepper. Spread chicken on a flat surface and fill with sliced apples and Brie.

Wrap up the ends and then the sides of chicken to form bundles. Secure with toothpicks. Chicken can be prepared up to 1 hour ahead of time and refrigerated until ready to bake.

In a deep bowl, lightly beat egg with salt and pepper. Dip the bundles in egg wash and then roll in crushed corn flakes to fully coat. Arrange seam down in a baking dish.
Bake in a 375 F oven until cooked through, around 20 to 30 minutes. Let stand a few minutes before slicing.

Thursday, November 6, 2008

Tangy Orange Chicken Goodness


I love going to restaurants and I’m not afraid to say it. I know that people who pride themselves on their home cooking are supposed to have an aversion to restaurants, but I love to have other people cook for me. I enjoy the opportunity to see what other people have done with food, and gain inspiration about what new things I want to (and more importantly, don’t want to) try.

And as embarrassed as I am to admit it, one of my guilty pleasures is Panda Express. For years I have been a huge fan of their Orange Chicken and it has always been one of my favorite treats after a long, hard, cold winter day. Yet it had never occurred to me that I could actually make this dish for myself.

I was very skeptical about my ability to recreate this dish in a way that was reminiscent of the original dish – but the end result surpassed my every expectation! It may have even been – gasp – better than the original. The chicken was crisp on the outside and juicy on the inside. The sauce was tangy and spicy. And aesthetically, the dish looked perfect.

I guess I won’t be going out anytime soon when I want to splurge on Chinese.

Tangy Orange Chicken Goodness
(adapted from Annie's Eats)
Ingredients:
For the marinade and sauce:
1 ½ lbs. boneless skinless chicken thighs or breasts, cut into 1 ½” pieces
¾ cup low sodium chicken broth
¾ cup fresh squeezed orange juice
1 ½ tsp. grated orange zest
8 thin strips orange peel (optional)
6 tbsp. distilled white vinegar
¼ cup soy sauce
½ cup dark brown sugar
3 medium garlic cloves, minced
1 tbsp. fresh grated ginger
¼ tsp. cayenne pepper
1 tbsp. plus 2 tsp. cornstarch
2 tbsp. cold water

For coating and frying:
3 large egg whites
1 cup cornstarch
½ tsp. baking soda
¼ tsp. cayenne pepper
3 cups peanut oil (or canola oil)

Directions:
For the marinade and sauce, place the chicken in a Ziploc bag; set aside. In a large saucepan, combine the chicken broth, orange juice, zest, vinegar, soy sauce, brown sugar, garlic, ginger and cayenne pepper; whisk until the sugar is fully dissolved. Measure out ¾ cup of the mixture and pour it into the bag with the chicken; press out as much air as possible and seal the bag, making sure that all pieces are coated with the marinade. Refrigerate 30-60 minutes, but no longer. Bring the remaining mixture in the saucepan to a boil over high heat. In a small bowl, stir together the cornstarch and cold water; whisk the cornstarch mixture into the sauce. Simmer, stirring occasionally, until thick and translucent, about 1 minute. Off the heat, stir in the orange peel (if using); set the sauce aside.

For the coating, place the egg whites in a pie plate and beat with a fork until frothy. In a second pie plate, whisk together the cornstarch, baking soda and cayenne until combined. Drain the chicken in a colander or large mesh strainer; thoroughly pat the chicken dry with paper towels. Place half of the chicken pieces in the egg whites and turn to coat. Transfer the pieces to cornstarch mixture and coat thoroughly. Place the dredged chicken pieces on another plate or a baking sheet.

To fry the chicken, heat the oil in an 11- to 12-inch dutch oven or straight sided sauté pan with at least 3 qt. capacity over high heat until the oil reaches 350° on an instant read or deep fry thermometer. Carefully place half of the chicken in the oil; fry to golden brown, about 5 minutes, turning each piece with tongs halfway through cooking. Transfer to a paper towel lined plate. Return the oil to 350° and repeat with the remaining chicken.

To serve, reheat the sauce over medium heat until simmering, about 2 minutes. Add the chicken and gently toss until evenly coated and heated through. Serve immediately.

Friday, October 17, 2008

Whisky Drenched Carrots

I bought my very first cast iron skillet a year ago and I was so excited. During my recipe scanning I had often encountered delicious sounding dishes that began cooking on the stove and finished it in the oven. So when the opportunity arose last year, I delightedly decided to purchase a skillet.


And I just have one thing to say: Man do these things rust easily. But that is neither here nor there.

On several occasions I had relished in the experience of cooking with my new skillet (watch out, the handle gets hot!), I had not yet used the functionality for which I had purchased it; cooking in the oven. So when I stumbled across a recipe for skillet cornbread, I knew I had to make it. Immediately.

And thus I proceeded to plan that evening’s meal around the cornbread. I easily decided on a pot roast as the protein portion of the dinner, because its almost (but not quite) cool in Sacramento at this time of year and I felt that it was time to break out the winter recipes.


Because my BF is such a good sport and eats anything that I cook up (except for that horrible meal that immediately found its way into the trash), I try to incorporate dishes that appeal to his personal tastes. So when I stumbled upon this recipe for Whisky Glazed Carrots I was stoked. While not something that I ever would have picked out for myself, it included his favorite veggie and his favorite drink, so I figured I couldn’t go wrong with the side dish.

To my surprise, the corn bread was ok, the roast was ok, and the carrots were spectacular. Their taste was explosive (Literally. I accidentally set them on fire.), and they easily outshined the rest of the meal, even the joy I got from baking in my skillet.

Whisky Drenched Carrots
2 - 3 pounds carrots, peeled and cut into thick circles
1 stick (1/2 cup…1/4 lb) butter
1/2 cup Jack Daniels or other whiskey
1/2 to 3/4 cup brown sugar
1/2 to 1 teaspoon salt
Freshly ground pepper


Directions:
Melt 1 tablespoons butter in a large skillet over high heat.

When skillet is extremly hot, add carrots in two batches, cooking for 60 to 90 seconds each batch or until carrots have been lightly browned.

Remove from carrots from the skillet. Pour in whiskey and allow to cook off for 30 seconds.

Reduce heat to medium and add remaining butter. When butter melts, sprinkle brown sugar over the top. Stir together, then add carrots to the skillet.

Cover, and continue cooking for 5 minutes. Remove lid and add salt and pepper. Continue cooking until carrots are done and glaze has thickened, about 5 more minutes. Pour onto a platter and serve immediately. Sprinkle with chopped chives if desired.

Sunday, October 5, 2008

The Peanut Dilemma

After being completely overwhelmed by my recent addiction to food blogs, I have decided that for better or for worse, I would start my own. The straw that broke this camel’s back was the discovery of Tuesdays with Dorie.

I had seen references to this group on several different websites, but I have a short attention span, and I figured that Dorie was the blogger and she liked Tuesdays. Wrong and wrong.

Turns out Tuesdays with Dorie is an online baking group that chooses and makes one recipe a week out of Dorie Greenspan's book Baking: From My Home to Yours.

The first recipe that have the opportunity to bake along with is Carmel-Peanut Topped Brownie Cake. Right off the bat I had food a dilemma.

I don’t like peanuts.

Don’t get me wrong, I LOVE peanut butter (creamy, not crunchy), it’s just the raw peanuts that I can’t stand. I have never understood people who go to baseball games, get a bag a of peanuts, and munch away as the shells pileup around their feet. The majority of the time I am wearing flip flops and the sensation of slippery shells underfoot is just unpleasant. In fact, I recently went to a BBQ restaurant in my neighborhood where they hand out peanuts, as opposed to the traditional bread, as an appetizer. They even encourage you to throw the shells on the ground. I watched the patrons toss their peanut shells around willy-nilly while a lone waitress futilely swept up the joint. Huh?? But I digress.

Upon seeing the recipe I lost some of my enthusiasm. Really? A cake topped with peanuts? My mind raced with possibly peanut substitutions. Crushed oreos? Pecans? Leaving the topping as plain caramel?

But none of those options seemed to embody the reasons that I chose to participate in this group. I want to become a better baker and cook. I want to try recipes that are outside of my comfort zone.

So I decided to be a sport and follow the recipe as written.

Besides, I'm pretty sure I can pawn-off any dessert on my coworkers. With or without nuts.
Related Posts Plugin for WordPress, Blogger...